Lightroom backup workflow
December 13, 2022
2 min read
Midway through 2022, I began using Lightroom Classic to manage and edit camera-captured images. Now that the end of the year is approaching, I’ve decided to organize and back up the photos from this year on my Lacie portable hard drive so I can free up space on my MacBook Pro.
Setup
All of my photos are stored in three distinct locations:
- MacBook Pro (500GB): ad-hoc editing
- Sandisk Extreme Portable SSD (1TB): bulk editing
- LaCie Portable Hard Drive (4TB): backup
I usually bring my laptop with me when I travel. After each day I would import my photos directly into my laptop and edit them right away. Sometimes, I import the photos to the SSD drive. LaCie hard drive is mostly used for making backups.
Backup workflow
I use Lightroom Classic to help me with this. I decide to store the backup photos in hard drive in a following structure:
photos
└─ 2022
   └──2022-01-23 <Event/Trip/Destination Name>
      ├── Raw
      ├── JPEG
      └── Export
Add external hard drive to Folders
On the left side bar, go to “Folders” and click “Add Folder…”.

Add the location in external hard drive where we want to store our backups.
Select photos
Use “Smart Collection” to create collections that distinguish between Raw and JPEG images. Obviously, we can also sort by date/location/…
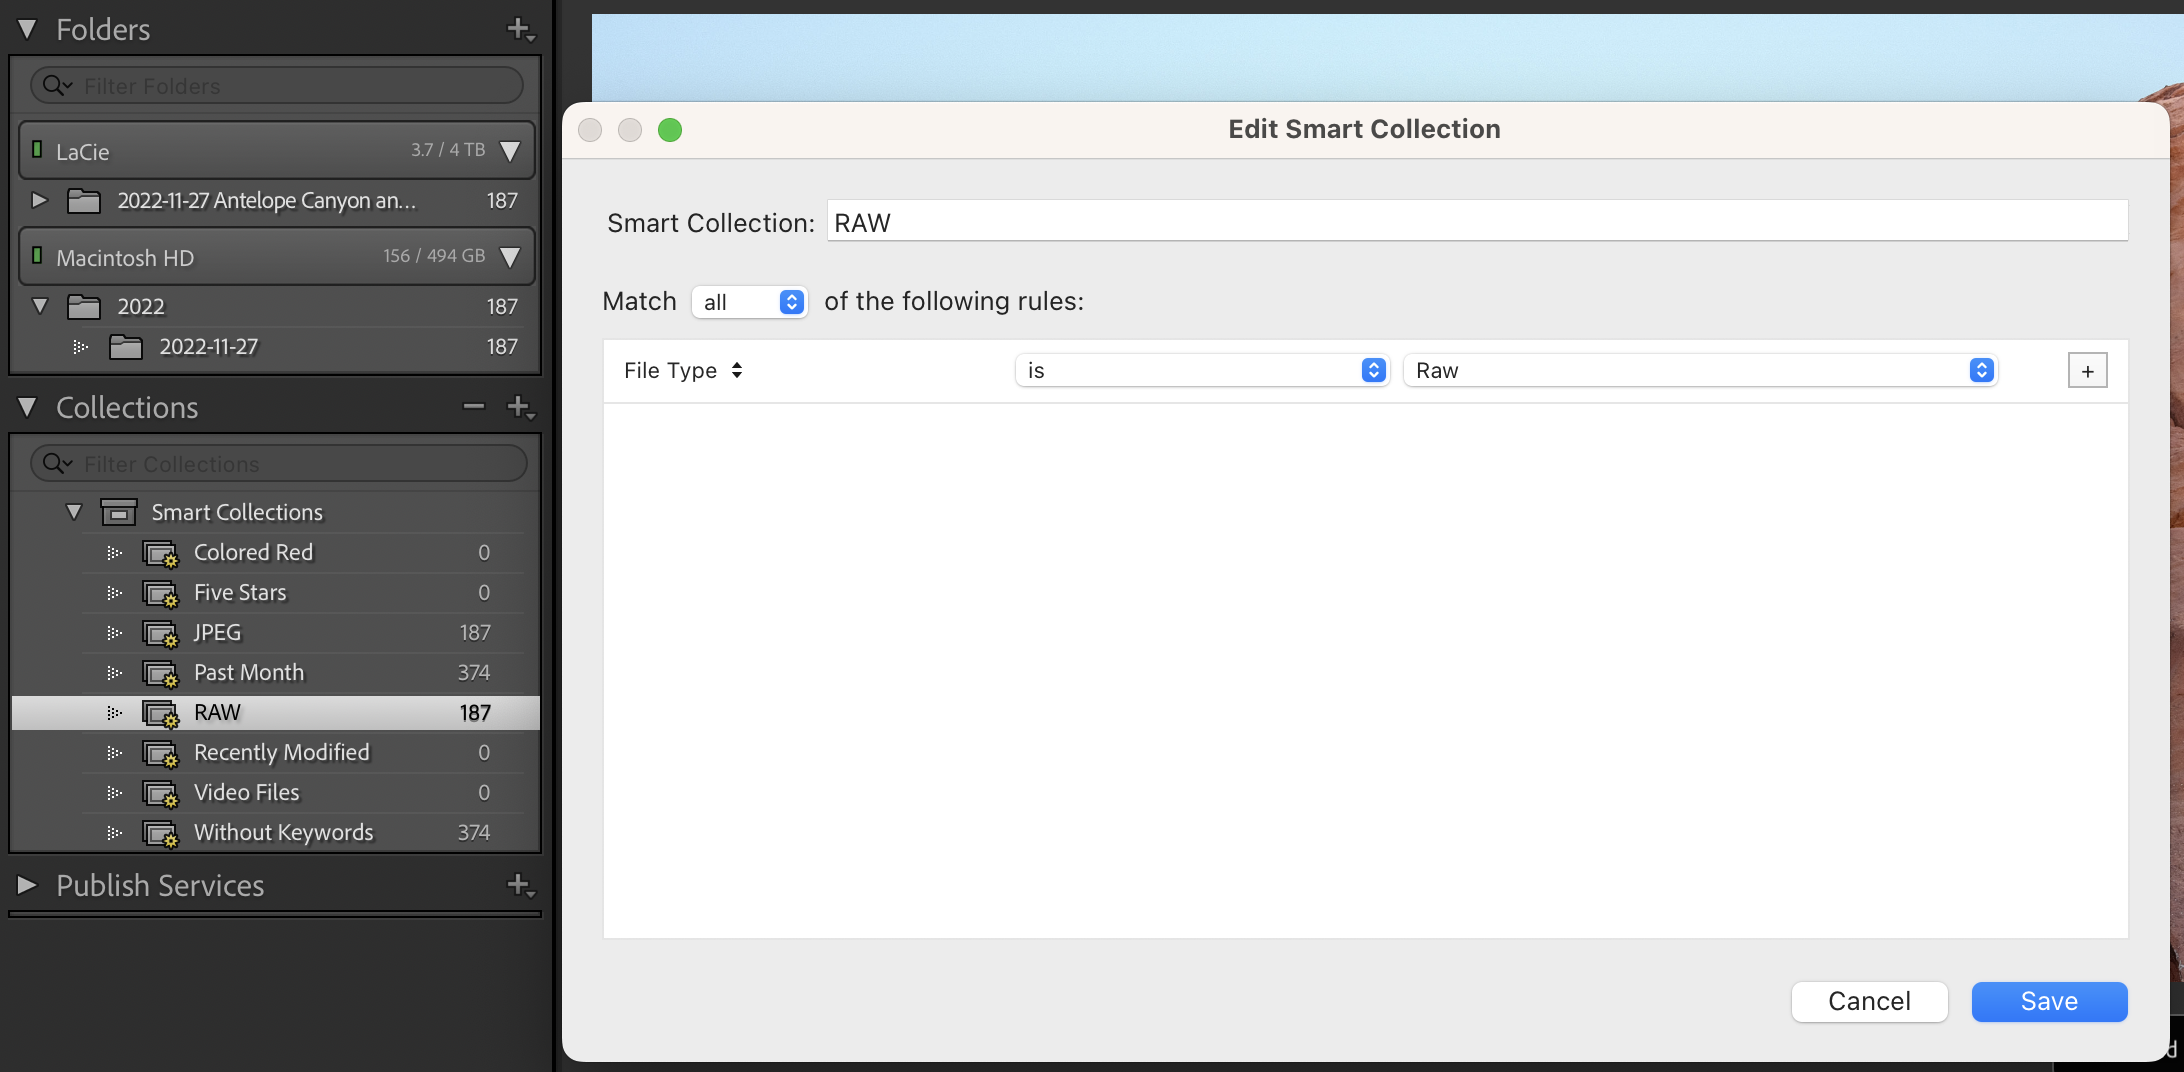
Once we finished filtering, just select all by Cmd + A.
Move photos
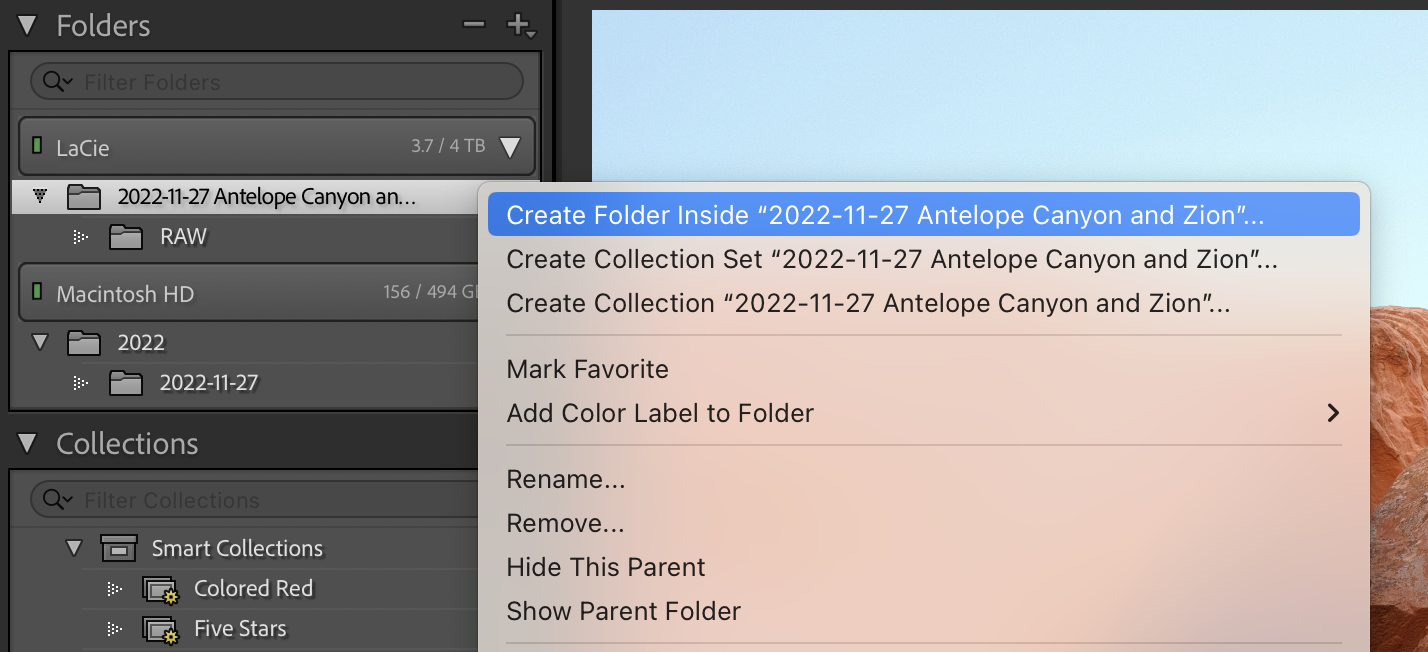
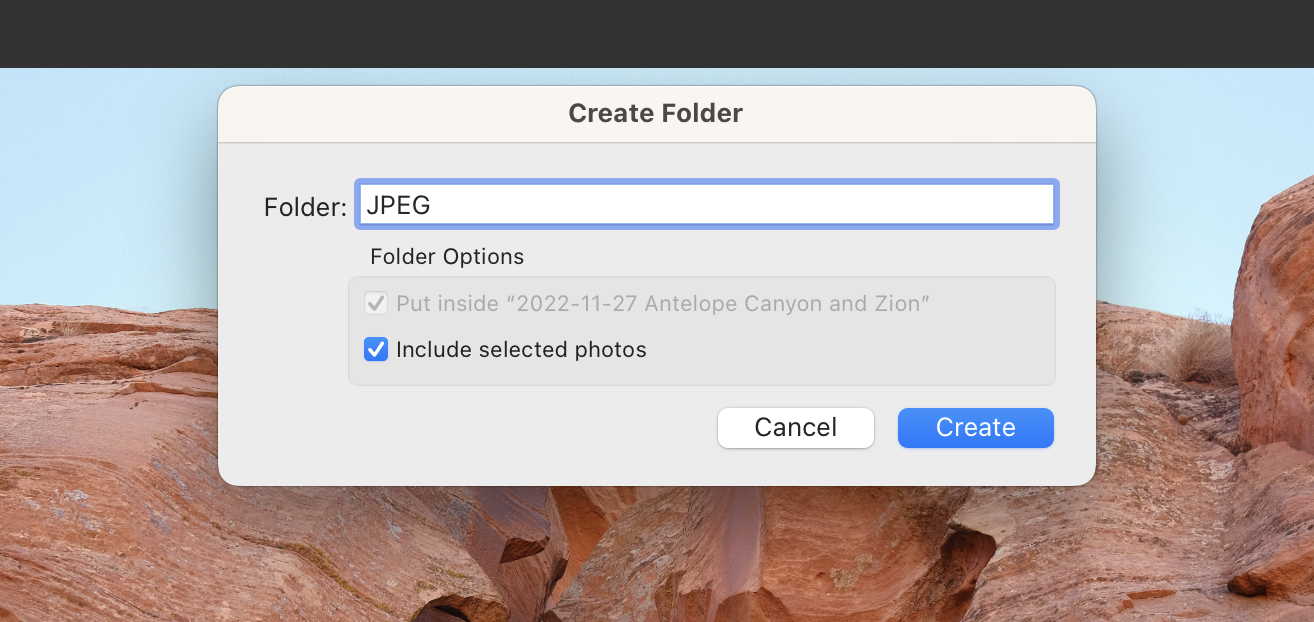
In the sidebar on the left, right-click to create a subfolder for our photos.
Select “Include selected photos” to transfer the chosen images to the folder.
Thoughts
Initially, I separated each trip into its own Lightroom catalog, but it turns out I could manage them all with a single catalog! Lightroom’s collections feature is versatile and powerful, allowing us to filter and separate photos. Using a single catalog also simplifies backup procedures.